Ballet Cupcake Tutorial
When planning for Alexandra's upcoming birthday her Mom reached out to ask me about doing either a sleepover cake or a ballet-themed cake. I found several inspiration pictures to send her way and included one lovely image of ballet cupcake dress cupcakes. The slideshow below shows our starting point.
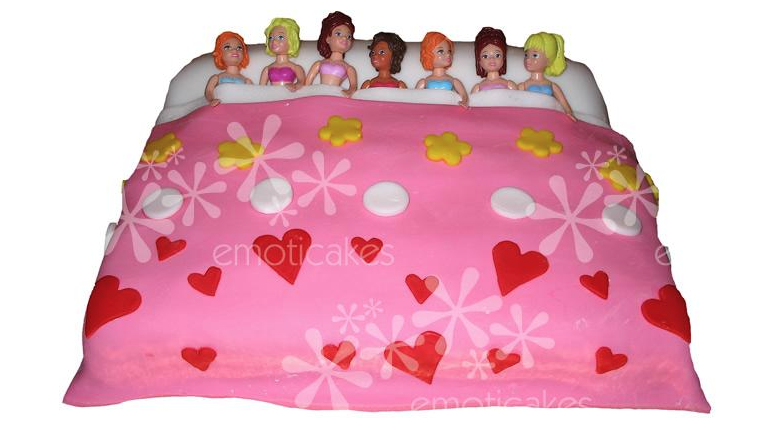


Alexandra chose to use the dancer cake as the model for her cake. I liked this choice: it would be fun! I chose to pull some elements from the cake, but mostly the point of the inspiration was the dancer silhouette.
What do you think about adding in some dress cupcakes?
Her Mom wrote me early the week of Alex's birthday with hopes to surprise her daughter with some cupcakes at dance class. Would I be interested in making the dance dress cupcakes? Sure! The only problem I suddenly realized was that the dress cupcakes, while lovely, were made fully from fondant or gum paste. We could do a filled cupcake so that there would be icing for the girls, but I had the image of a bunch of dancers pulling off the cute top and just eating the cake. What if we created something that was made from icing so that they could enjoy tasting it and looking at it? Alex's cupcakes also needed to be dairy free and the frosting is notoriously challenging to pipe with. I knew this would be a slight limitation.

A Video Tutorial
I shared in another post that I'm only just starting to be open to watching video tutorials, and that is largely due to the fact that there aren't as many picture how-to things out there. While taking my daughter to college auditions I had some time to look around for "ballet-themed cupcake tutorials" and I found one that I really liked. Watch this tutorial from My Cupcake Addiction for a complete how-to for making ballet dress cupcakes. Alex's Mom liked the pastel theme of the cupcakes and she shared that her daughter's favorite color was blue. We had a plan!
Dairy-free Baking
I love baking gluten-free, dairy-free, vegan etc. It is a great challenge and if I'm being totally honest I like vegan baked goods better than regular, so dairy-free baking can result in me taking too many samples for sure! But, for decorated cupcakes, the consistency of dairy-free can be tricky. It is challenging to get the frosting to be a consistency where it can be piped for a long while without it being too sugary. I solved this problem with regular refrigeration in two ways. First, I refrigerated the frosting before using it and then when it got too soft from my hands, and secondly as soon as I finished a cupcake I would put it right back into the fridge. Later, I took all the chilled cupcakes and boxed them and put them right back in their chilled space.
How to make the dress part
First I found a heart cutter that was long enough to stand up outside of the dress and colored the gum paste. Flower formers work nicely for them to dry on. Then I rolled out each color and cut out 10 hearts of the color.


For the adornments, I used little pearl beads, a small plunge flower cutter and some gold sequins. I used water to adhere the beads and gum paste flowers to the bodice. Then, I allowed them to rest for a few days before adding them to the cupcake.
The Cupcakes
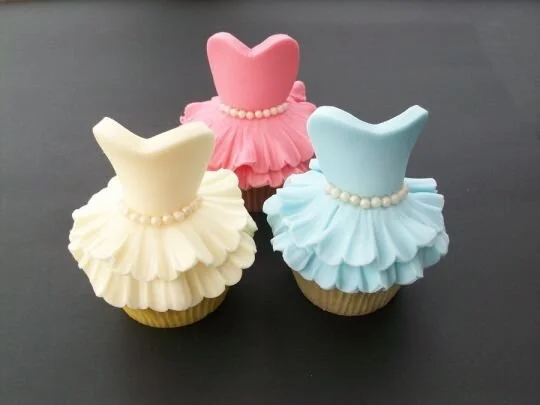
I loved the tutorial video, but I also wanted to create my own dress cupcakes. To that end I mixed up the colors a little bit, choosing the blue and yellow and blue and white. For the pink I chose to keep things monochromatic with the accent color of the yellow flower.
I wish I had a cutter that was slightly larger. My next size up was too big, but this one could have been just a bit bigger to have more bodice exposed. Still as a collection, they had a nice presence. My favorite part about these cupcakes is that by using mostly icing they taste as delicious as they are beautiful. That's the important part after all!!


And don’t forget the ballet cake!
Alexandra's actual birthday party was also a ballet theme with the ballerina silhouette as the star of the cake. I pulled her favorite color of blue and decided to incorporate a dimensional tutu into the dancer silhouette. I baked a simple dairy free chocolate cake with dairy free frosting covered in pale blue fondant and topped with the dancer. Adding 3 roses in the colors from the cupcakes and balls of fondant for the bottom edge completed the cake. It was a hard decision to choose between doing roses and round balls but I ultimately went with the roses on the top being the only flowers. Omitting the quilting from the inspiration cake made for a simple yet still elegant dancer cake. To make the ballerina topper, find a ballerina pattern you like and then roll out gum paste to your desired thickness. I suggest keeping it at least a quarter inch thick so that it has some stability.Use some luster dust to add some shimmer to the dancer. Then, roll out your skirt and use water to affix it to both sides of the dancer. Then, select your front and embellish the skirt with a waist accent. A couple of days later when the dancer is dry, use royal icing to affix a wooden dowel to the back of the dancer. You will use that to insert the dancer into the cake once she reaches her final destination.