Stack of Books Cake
This is a tutorial for making a stack of books out of cake. This particular cake was for a wedding! The couple had some fun titles and loved the idea of a stack of three books for their wedding.
Prepare your book cakes
First, bake the cakes. The bride and I agreed that the books would be 2-3 inches high and somewhere between 8x10 and 11x13 in length and width. The bottom book would be the largest and they'd get slightly smaller as they went up. I chose 12x10x2.75 for the bottom book, 9x11x2.5 for the middle book and 8x10x2 for the top book. Because you need to measure to cover the books with fondant, it is important to determine the sizes in advance.
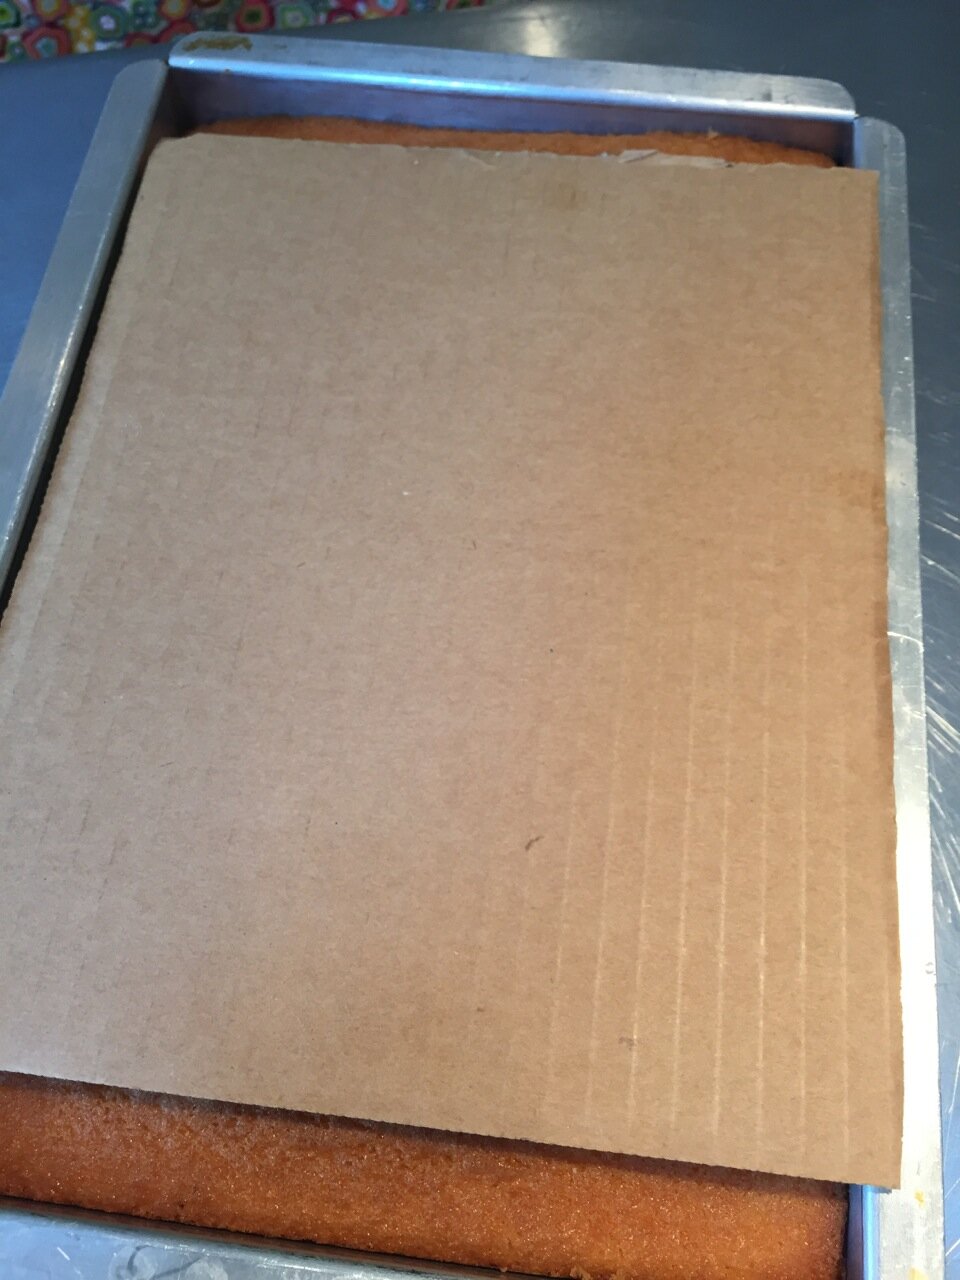
For a stack of 3 cakes, you can bake 3 cakes, or bake a larger cake and one smaller cake and cut them into the proper sizes. I baked three full cakes for this project: the first one in a 12x12 pan, another in an 8x12 pan and the last in a 9x13 pan. I cut cardboard bases to the proper sizes for each cake. For the cardboard, I suggest using the Fiskars Rotary Cutting Set for marking and measuring, and an Exacto knife for cutting.
Once the boards are prepared, place each cake onto its board. My cakes were just shy of 2 inches tall. I split and filled each cake with frosting to give it the proper height. I also trimmed the cakes to size and crumb coated them.

Prepare your fondant
When the cakes are all crumb coated, put them in the fridge to chill. You can now prepare your fondant. I worked with a combination of Satin Ice pre-colored fondant, AUI Swiss Massa Americana and AUI gum paste. I love the workability and taste of the AUI product and I enjoy the bright colors, packaging and lower price point of the Satin Ice. I chose not to use paste or gel coloring for this because the Satin Ice fondant provided enough color. It takes some time to properly mix the gum paste, white fondant and colored fondant together. You may use any fondant that you desire, and you can also mix a little bit of Tylose powder (apx 1 tsp per pound of fondant) instead of using gum paste as part of your mix.
Add pages to your books
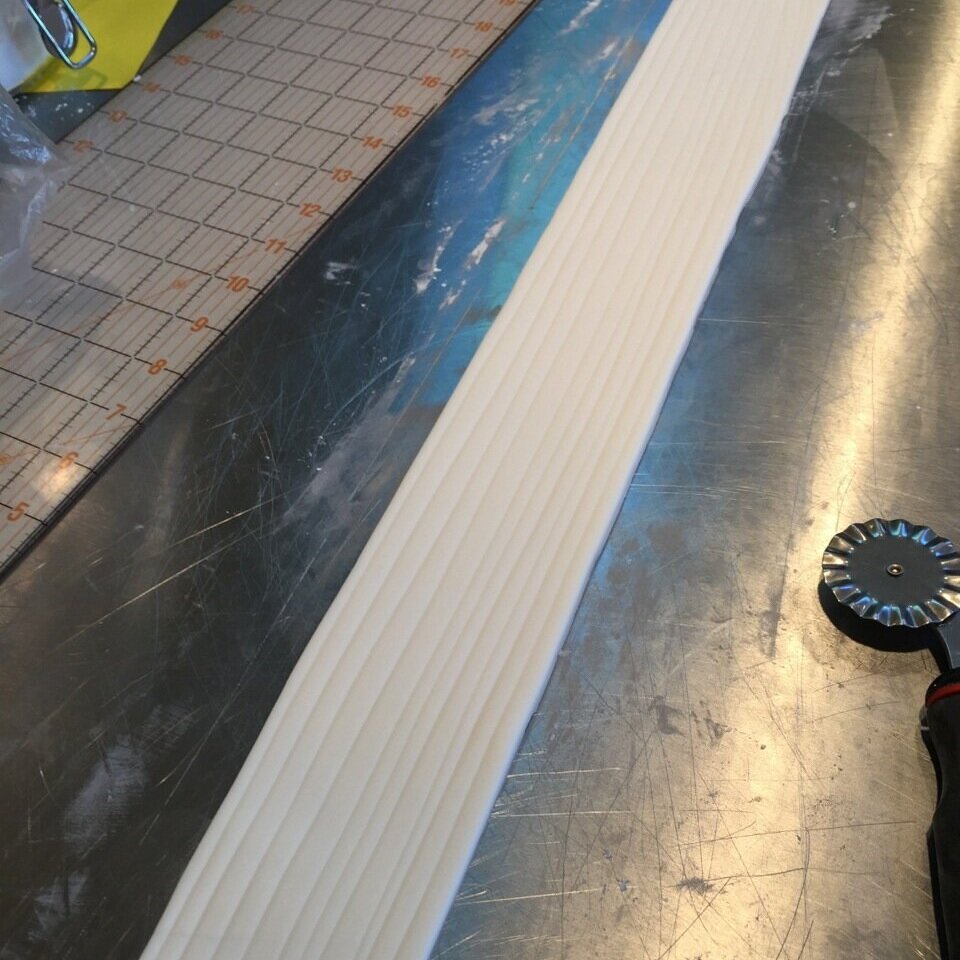
When it is time to add pages to your stack of books cake, roll out a strip of white fondant that is the width of the height of your book. For my first book, I needed a 2 3/4" strip of fondant. Roll to the desired length. It is ideal if you can make a strip long enough that you don't need a seam (for my bottom book this is 32 inches long). If you do need to seam things, make your seam at one of the page edges. After you roll out the strip, use a ravioli cutter to lightly make lines for the pages. Be careful not to cut all the way through the strip of fondant. Then, lightly dust with cornstarch and roll up the ribbon of fondant. Then you can gently peel it off and place it against the book edge.
Fondant Book Covers
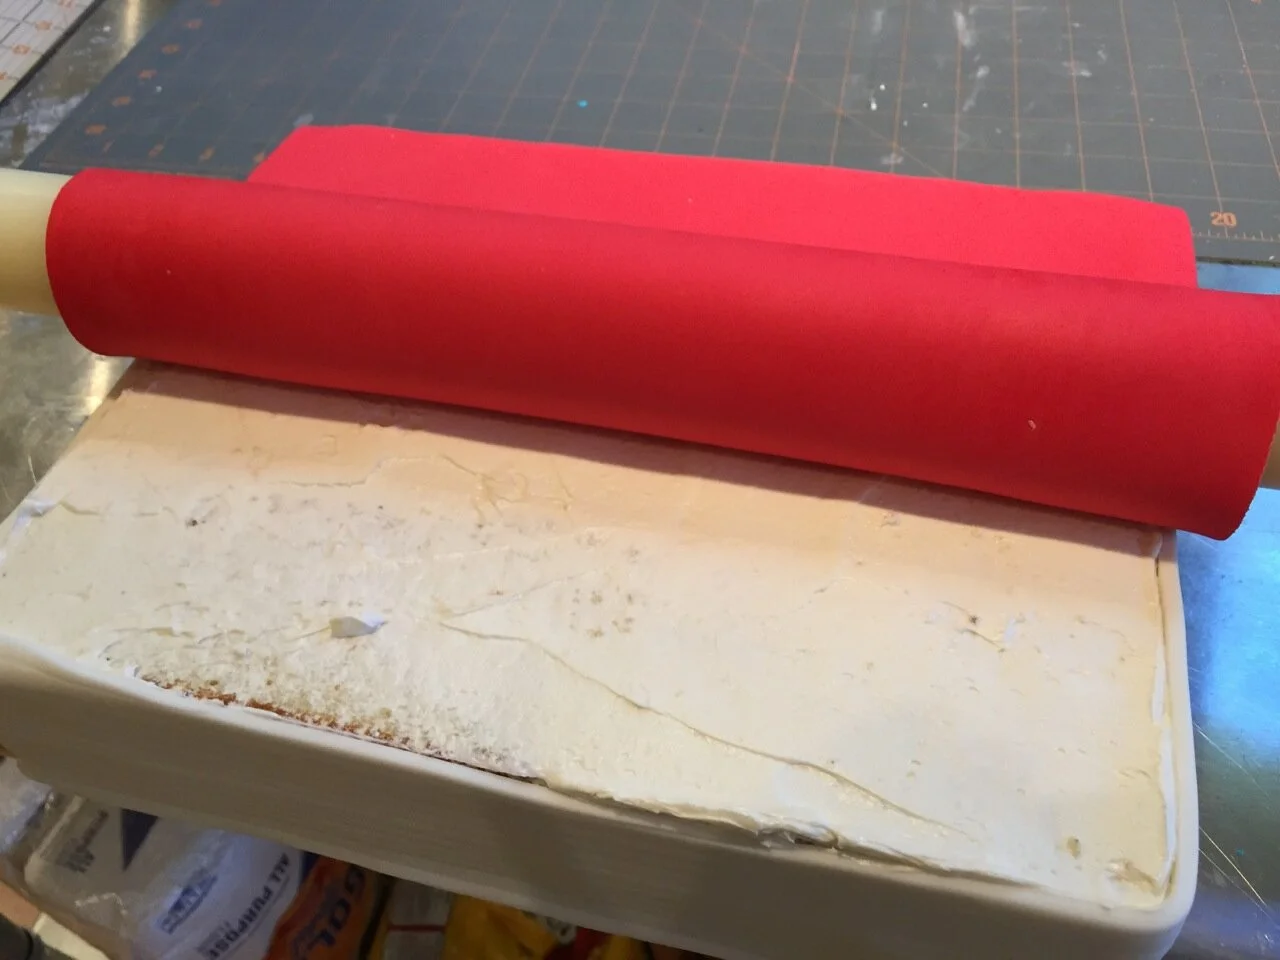
This is the part of the process when things could become tricky. They say the third time's the charm, but for my books it took 5 attempts to be successful. For the book cover you need to take into account the height of your book as well as its length and width. When you look at a real book, you'll notice that the cover overhangs by about 1/4 inch on all sides. Add that to your measurements as well. For my bottom book, my cake measured 12x10x2.75. This means my cover needed to have a height of 12.5 and a width 13 1/4 (this accounts for the height of the book, so remember to add that in). Once you know the size you need to make, you can roll it out. It helps to roll it out on a gridded surface so that you have an idea of when it is large enough.


Cover Your Book
When you have rolled out your cover and cut it to size, place the cover on the book. It is important to place it on a chilled, crumb-frosted cake. Remove your cake from the fridge and gently roll your cover around a rolling pin. Starting at the bottom edge of the book, unroll the fondant and pull it across the top. Gently lay it down and then use a fondant smoother to create a smooth surface. After you place the top cover on the book, roll out another piece of the same color of fondant. You will cut this to approximately 1/4" size to edge the 3 exposed edges of the book. This will be your bottom cover. Since it is the only part of the bottom cover you actually see, you don't need to have an entire sheet of fondant for your bottom cover.

Finish the Stack of Books
After you have completed your first book, place your supports as shown below. This keeps the next book on the stack from falling into the bottom cake. I used supportive straws cut to the size of the height of the cake. Place 5-6 of them in the cake, spread a layer of icing and then lay the next fully covered book on the top of the first book. Repeat this procedure for the entire stack.

Complete it: Your Stack of Books Cake!
This cake was a stack of 3 books. Their titles: Materials Engineering, Introduction to Wines, and Distilled Spirits. For the top, the couple decided they didn't want to have a cake topper. I thought about putting the title of the top book on the front cover, and also about putting their wedding date. I couldn't decide, so I called my entire family into my kitchen. My son Xander had the winning idea to put an envelope on the top, seal it with a heart and write their wedding date on the envelope.